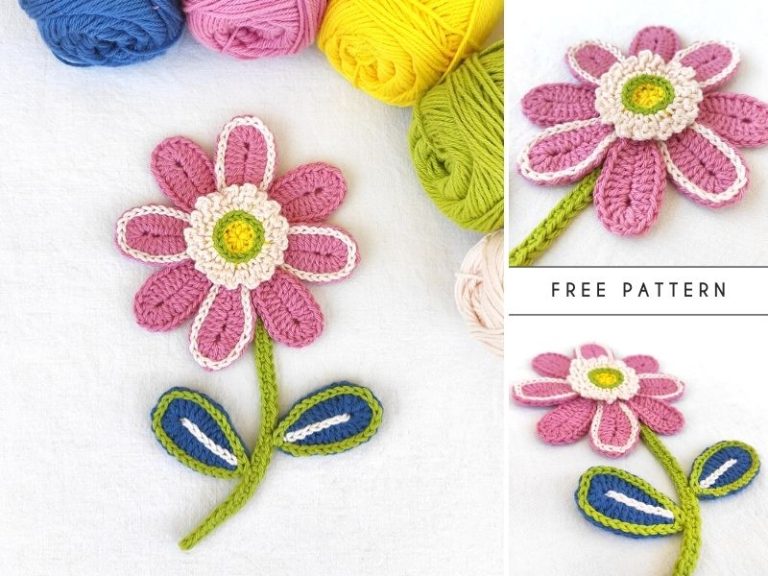
Puff Flower Bookmark Free Crochet Pattern + Video Tutorials
As an avid reader, I have a very special place in my heart for beautiful bookmarks. They truly enhance the experience, making it much more romantic and aesthetically pleasing. This time, I was inspired by the classic spaghetti bookmark with a flower on top and leaves at the bottom, but wanted to make it more special.
This project was designed for YourCrochet.com. This article includes a written pattern and video tutorials.

About The Project
I came up with two puffy flower head versions and a vivid green stem with two leaves at the end. One flower head is smaller and round, while the other creates a dome shape. While the first one resembles a bud or a berry, the bigger one looks more like a flower. It’s up to you which version you choose. Both use very little yarn.
Even though the bookmarks look simple, this project won’t be suitable for complete beginners. I incorporated some advanced techniques into this pattern, such as standing puff stitches.
Materials and Tools
To make these bookmarks, you will need:
- Scheepjes Catona yarn, which is mercerized cotton. Their color palette is truly stunning, as you have over 100 colors to choose from.
- A 2.5 mm crochet hook, so you will achieve fantastic details.
Measurements
The length of this bookmark is 23 cm (~9 inches). You can easily customize it by making more chain stitches on the stem.
Terms
standard US.
Stitches and Abbreviations
- magic ring
- ch – chain stitch
- sl st – slip stitch
- sc – single crochet
- hdc – half double crochet
- dc – double crochet
- st – stitch
- ch-sp – chain space
- C1 – color one (for the stem: in my case, green)
- C2 – color two (for the flower base: in my case, yellow)
- C3 – color three (for the flower: in my case, blue, peach, or magenta)
To learn how to crochet basic stitches, please see my playlist for beginners on YouTube.
Special Stitches
2yo puff – a puff stitch with two yarn overs. Here’s how to do it:
On your hook is one working loop.
- Yarn over, insert the hook in the right stitch, pull up a loop. Now you’ve got 3 loops on your hook, counting the yarn over.
- Again, yarn over, place the hook in the same stitch, pull up a loop, so you have 5 loops.
- Guide the yarn through all 5 loops.
- Chain one.
3yo puff – a puff stitch with three yarn overs. Here’s how to do it:
Repeat the instructions from 2yo puff, but add one more yarn over (step 2), so you have three in total. In step 3, you should have 7 loops on the crochet hook. Chain one at the end to close the puff.
5yo puff – a puff stitch with five yarn overs. Here’s how to do it:
Repeat the instructions from 2yo puff, but add three more yarn overs (step 2), so you have five in total. In step 3, you should have 11 loops on the crochet hook. Chain one at the end to close the puff.
Standing puff – this method creates a nice beginning of the round without the turning chain. Place a slip knot on your hook, yarn over (“in the air”), and then work the stitch normally where it’s needed.


Video Tutorials – Small Flower Head Bookmark
Right-Handed Crochet Tutorial
Left-Handed Crochet Tutorial
Video Tutorials – Large Flower Head Bookmark
Right-Handed Crochet Tutorial
Left-Handed Crochet Tutorial
Flower Bookmark Free Crochet Pattern
As I mentioned, there are two sizes of the flower head to choose from – the smaller one, which is round, and the bigger one, creating a dome shape.
First, we make the stem – the big leaf, the small one, then the chain stitch stem – all without cutting the yarn. Next, we make the flower head, which we attach to the stem. Finishing touches include securing the tie, hiding the yarn ends, and gentle steam-blocking.
The Stem
10 ch, 1 sl st in the 2nd chain stitch. 1 sc, 1 hdc, 2 dc, 1 hdc, 2 sc, 1 sl st.
Make 2 ch and turn the work upside down to work the same stitches, but from the other side (upside down). Insert the hook under the unused strand of yarn to avoid gaps.
1 sl st, 2 sc, 1 hdc, 2 dc, 1 hdc, 1 sc, 2 sl st (make the last slip stitch in the tip of the leaf).

Don’t break the yarn, the first leaf is ready.
10 ch, 1 sc in the 2nd chain stitch, 1 sc, 2 hdc, 1 dc, 2 hdc, 1 sc, 1 sl st (worked under both strands of yarn). Insert the hook in between the two leaves, pull up a loop, and work 1 sc.

The leaves are ready.
I chained 65 to achieve 23 cm (~9 inches) of stem length, but you can chain however many you need.
When your stem is ready, cut the yarn, but leave about 7-10 cm (3-4 inches) of tail. We will need it to tie the stem to the flower head.
Flower Heads
I use a standing stitch whenever we change the color of yarn to avoid turning chains.
Small Flower Head – Round
C1 | Start: Magic ring.
C1 | Round 1: 3 ch, 5 dc inside the ring, sl st to close the round, and tighten the loop.
Cut and secure the yarn.
Change the color to C2.
C2 | Round 2: 3yo puff stitch x 6 in between the double crochets. Make a standing puff stitch as the first puff of the round. Close the round with 1 sl st in the first puff.
Cut the yarn and secure it.
Attaching the flower head to the stem
- Insert your hook into the flower so it sticks out at the bottom, in the middle of the magic ring.
- Grab the yarn end of the stem with your hook and guide it to the inside of the flower.
- Weave all yarn ends to the inside: both the end of the stem and the end from the magic ring.
- Tie them together tightly inside the flower and trim the ends.

The stem and the flower head are now tightly combined.
Change the color to C3 and continue.
C3 | Round 3: 5yo puff x 6 in the chain spaces between the 3yo puffs from the previous round. Make a standing puff stitch as the first stitch of the round. Then, 1 sl st in the first puff to close the round.
C3 | Round 4: Repeat round 3. At the beginning of the round, pull up the first loop to match the height of the puff, and continue working 5yo puffs normally. Start in the nearest chain space behind your hook.
C3 | Round 5: 2yo puff x 6 in the chain spaces, but omitting the one chain stitch at the top of the puff. You should have 6 loops on the hook at the end of this round. Lead the yarn through all loops, then tighten it to close. Note: Working in the round with just 6 stitches may be challenging, so I recommend transferring 3 puffs to the stitch holder while you make another three. To close the flower head, lead the yarn through all loops one by one, first on the hook, then on the stitch holder.
Finish with one chain stitch, so that when you cut the yarn, the loop will close tightly. Weave the yarn inside the flower head.
Your crochet flower bookmark in the smaller version is ready.


Big Flower Head
C1 | Start: Magic ring.
C1 | Round 1: 3 ch, 6 dc inside the ring, sl st to close, tighten the loop.
Cut the yarn and secure the ends.
Change the color to C2.
C2 | Round 2: 3yo puff stitch x 7 between the double crochets. Make a standing puff stitch as the first puff of the round. Then, 1 sl st in the first puff to close the round.
Cut the yarn and secure the ends.
Attaching the stem to the flower head
- Insert your hook into the flower so it sticks out at the bottom, in the middle of the magic ring.
- Grab the yarn end of the stem with your hook and guide it to the inside of the flower.
- Weave all yarn ends to the inside: both the end of the stem and the end from the magic ring.
- Tie them together tightly inside the flower and trim the ends.
You’ve now combined the flower head and the stem.
Change the color to C3 and continue.
C3 | Round 3: 5yo puff x 7 in the chain spaces between the 3yo puffs from the previous round. Make a standing puff stitch as the first puff of the round. Then, make 1 sl st in the first puff to close the round.
C3 | Round 4: Repeat round 3. Pull the first loop to match the height of the puff (at the beginning of the round), then continue working 5yo puffs normally, starting in the nearest chain space situated behind your hook.
C3 | Round 5: 2yo puff x 7 in the chain spaces, but omitting the one chain stitch at the top of the puff. At the end of this round, you should have 7 loops on the hook. Lead the yarn through all loops, then tighten it to close. Note: Working in the round with just seven stitches may be challenging, so I recommend making 4 puffs, then transferring them to a stitch holder and making another 3. Lastly, lead the yarn through all of them one by one, including the four on the stitch holder.
Finish with one chain stitch, so that when you cut the yarn, the loop will close tightly. Weave the yarn inside the flower head.
How to create the dome shape
- Stick your hook right where the stem is attached, through the bottom of the flower (pierce it through the flower head). The end of your hook should stick out right where you closed the round 5.
- Lead the yarn with the crochet hook through to the bottom, so that it’s visible outside.
- Pull the yarn to create a dome shape, then wrap it around the stem, and tie it.
- Use your hook again to weave it back inside the flower head. Cut the excess yarn.
The crochet flower bookmark in the bigger version is ready.
Finishing
As usual, weaving in ends is a must! You can steam-block the stems using an iron to even out the leaves.


Share, like, subscribe!
If you happen to make this project, I would love to see it, so don’t hesitate to contact me! Feel free to share the results with me in the comments or on social media. Of course, if you find any mistakes in the pattern or find it hard to understand, please let me know, so I can learn and improve!
Sharing is caring, so if you liked this project, be sure to share it with your friends and spread the word, because I really appreciate it! For more free tutorials, patterns, and interesting articles, follow my social media pages and allow notifications to get a pop-up whenever a new post is published.